Overview
Mass import data for hundreds, even thousands, of event occurrences across one or multiple events.
The user-friendly importer is designed to save you dozens of hours of labor and turn an otherwise dull, yet crucial task, into a breeze. All you need to do is create the event(s) then use the importer to add all of the respective occurrence values.
A dedicated import admin panel provides a handy copy of the CSV template along with an equally handy list of all your venue IDs, which you’ll need to make sure the correct venue is assigned to each imported occurrence.
Step 1: Create Your Events
In order to make sure your occurrence data is added to the correct event, you must first create and save the event as a published or draft event post.
When filling out the import CSV file, you’ll need the event ID number so in order to make that easy for you, we added a new column to the “Events > All Events” admin panel.

Step 2: Download Sample CSV File And Add Occurrence Data
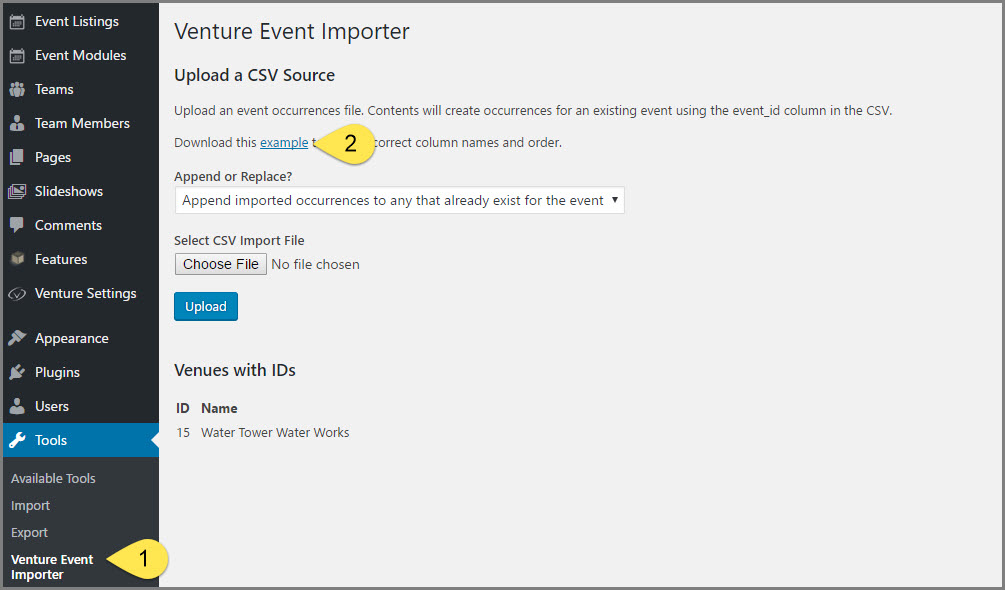
You can always download a copy of the sample CSV file by navigating to “Tools > Venture Event Importer” and selecting the link from “Download this example to get the correct column names and order.”
Step 3: Add Occurrence Data To CSV File
Each column in the CSV file corresponds to a data field in an event’s occurrence.

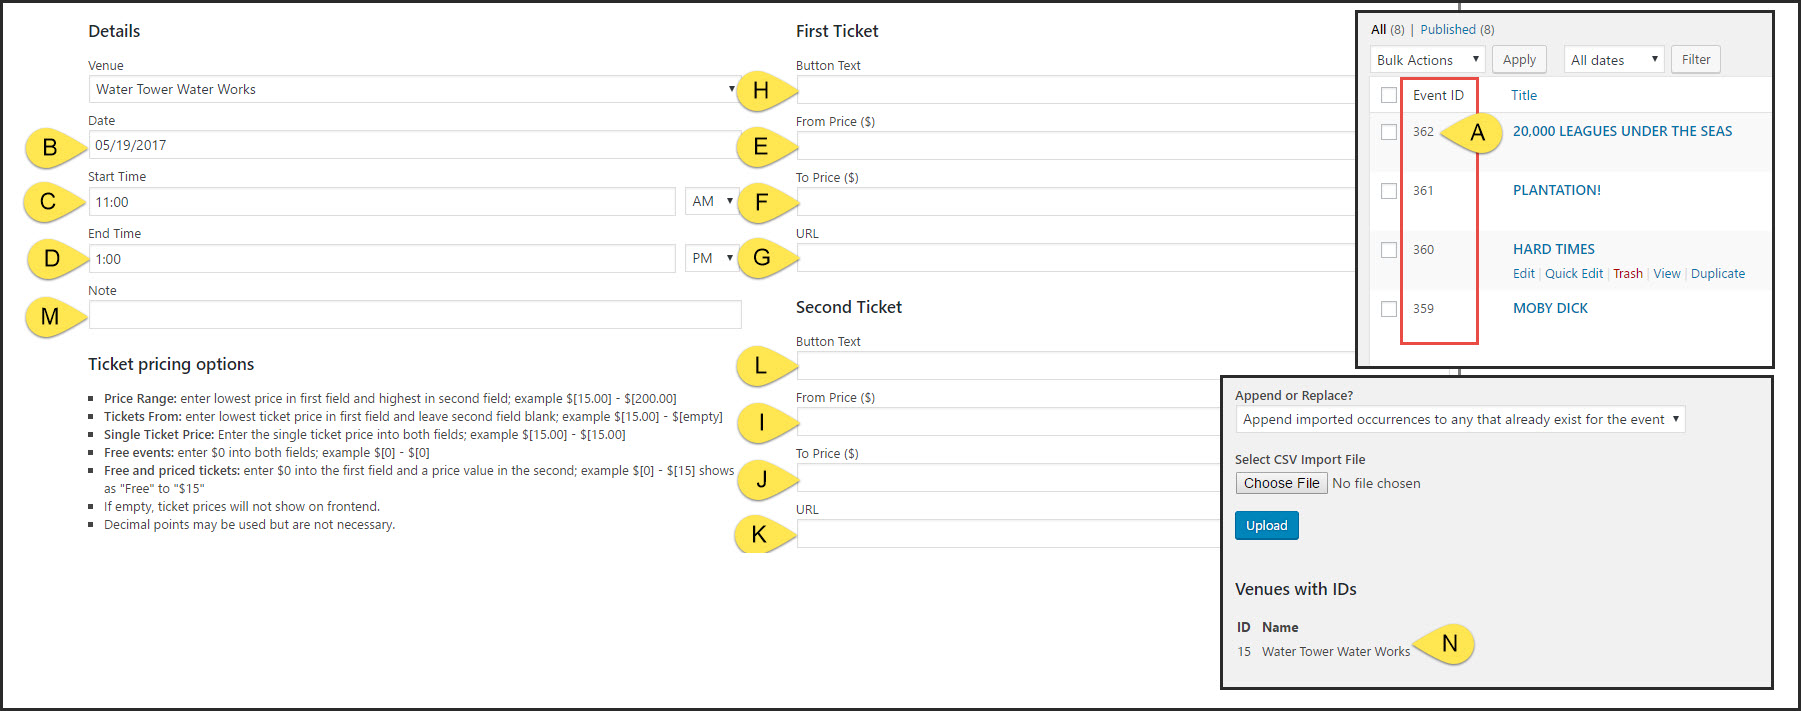
a) Event ID: required. You can obtain the ID number from the “Events > All Events” admin panel. You can add occurrences for one or more events per csv file.
b) Occurrence Date: required. The date must be entered in MM/DD/YYYY order although you may use single or double digit formatting for the month and day.
c) Occurrence Start Time: required. 24-hour time format is required.
d) Occurrence end Time: required. 24-hour time format is required.
e) Ticket 1 Price From: optional. Numbers only, using the existing “ticket pricing option” rules.
f) Ticket 1 Price To: optional. Numbers only, using the existing “ticket pricing option” rules.
g) Ticket 1 Purchase URL: optional. Use the full URL path, including http:// or https:// prefix. We strongly recommend you copy/paste this URL.
h) Ticket 1 Button Text: optional.
i) Ticket 2 Price From: optional. Numbers only, using the existing “ticket pricing option” rules.
j) Ticket 2 Price To: optional. Numbers only, using the existing “ticket pricing option” rules.
k) Ticket 2 Purchase URL: optional. Use the full URL path, including http:// or https:// prefix. We strongly recommend you copy/paste this URL.
l) Ticket 2 Button Text: optional.
m) Occurrence Note: optional.
n) Venue ID: required. You will find the full list of Venue IDs on the event occurrence importer admin panel. The list will update automatically as venues are added or deleted.
Save the CSV file. If you give the file a new name, you must only use alpha-numeric characters; no spaces.
Step 4: Import Your CSV File

- Select whether you want to append or replace occurrences:

Tip: if you are importing occurrences for the first time to an event, use the “replace” option as this will erase the default occurrence the system automatically assigns when the event was created. - From the Event Occurrence Importer admin panel, select the Choose file button and select your csv file.
- Select the Upload button.
The system will do all the heavy lifting and generate a success message when complete.
You can then go to the respective event(s) to confirm the occurrence information was imported correctly.
TIPS
- If you discover an import did not work as expected, know that we take full backup copies of your site each night. We can always restore that copy and let you start again.
- We’re happy to check your CSV file’s data for you prior to you uploading. Just send a copy to us via email.