Turning on Sections
By default, Sections can only be used on Pages and Posts.
Enabling Sections on the page will remove the default editor, and will also remove the sidebars from your page.
To turn them on, open your page/create a new page, and click the Use Sections toggle which should be at the top right.
![]()
Adding a Section
Once you’ve turned Sections on, the default editor will disappear, you’ll see the Add Section button.
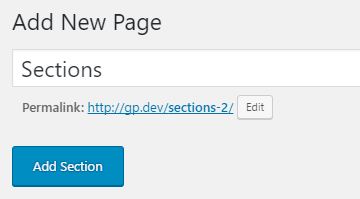
Clicking the Add Section button will add a new Section to the page.
Adding Content
You can click the Section title or the pencil icon to open the content area of your Section.
The Section content editor is an exact copy of the default WordPress editor, with all of the same options.

Opening the Section Settings
If your Section is already open, you can just click on the Settings tab on the left of your content.
If not, you can open the settings directly by clicking on the cog icon in your Section bar.

Section Settings
Sections have the following settings.
Layout
- Box type – whether your outer section container is full width or contained.
- Inner box type – whether your inner section container is full width or contained.
- Custom ID – Add a custom ID to your section – useful when linking to specific sections.
- Custom Classes – Add custom CSS classes to the section container.
- Top padding – Set the amount of padding (inner spacing) at the top of your section. Choose pixels or percentage.
- Bottom padding – Set the amount of padding at the bottom of your section. Choose pixels or percentage.
Colors
- Background color
- Text color
- Link color
- Link color on hover
Background Image
- Background image – Upload a background image for you section
- Parallax effect – Add a parallax (slight movement) to your background image on scroll