PR Listings are used to create a a frontend list of releases that can be displayed by title only, or with excerpted info. From the “PR Listings” admin panel, either open an existing PR Listing or select “Add New PR Listing.”
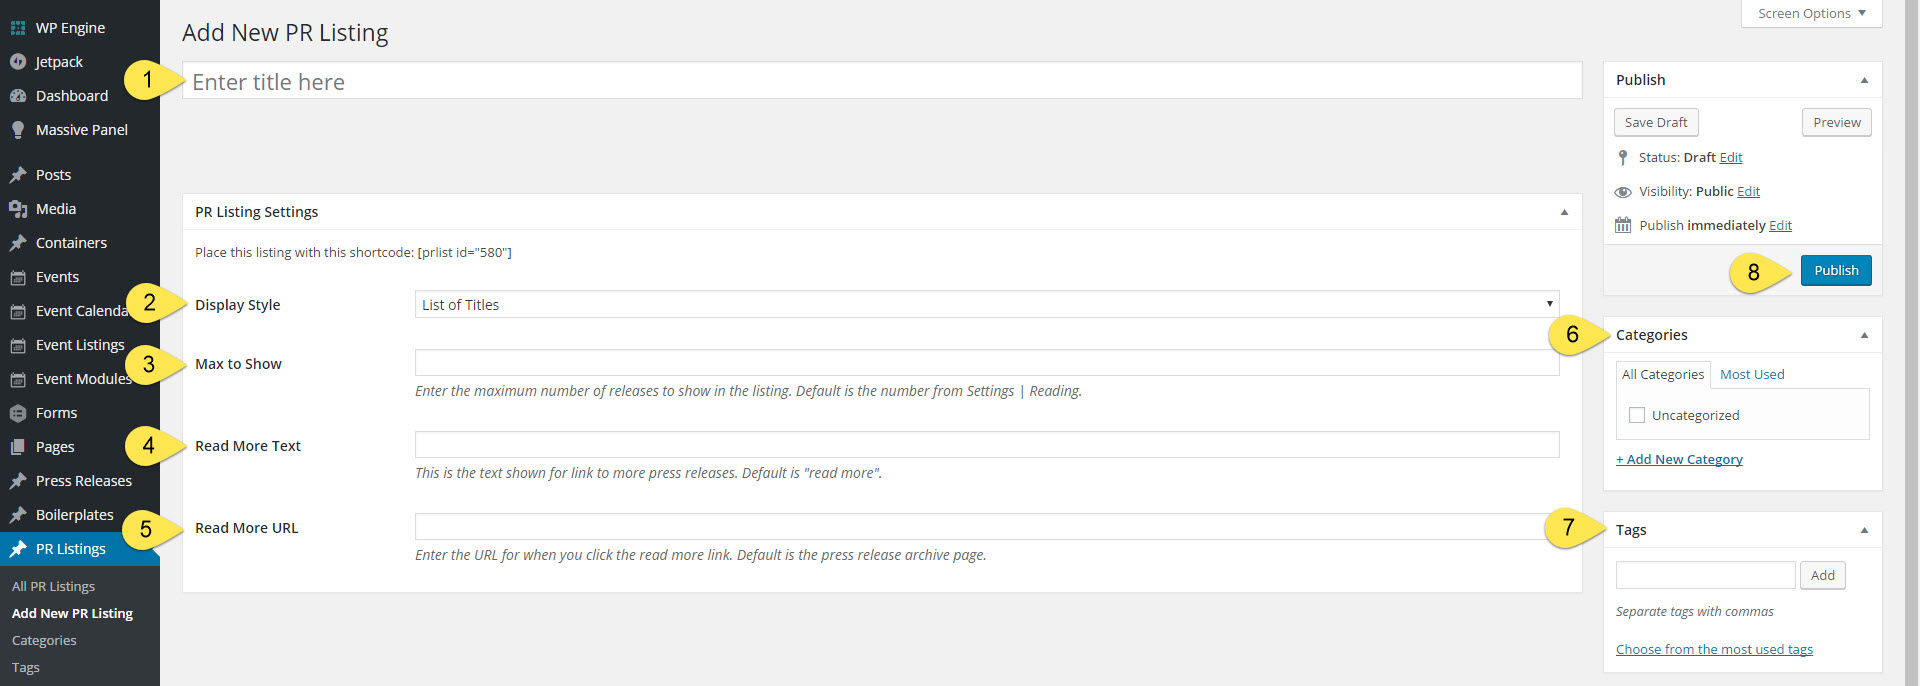
- Title: required but only used for admin purposes.
- Display Style: required. Choose one of the following options:
- List of Titles. This option will display the PR title only, linked to the single PR page.
- Formatted Content Blocks. This option will display the PR title, sub title, date, location, introductory paragraph, “read more” link, and PDF and/or Word download buttons.
- Max to Show. Enter the maximum number of releases to show in the listing before the “read more text” link to the full PR archive page is shown. If you do not enter a number, the system will use the default WordPress from “Settings > Reading.”
- Read More Text: optional. This is the text shown for link to full PR archive page. Default is “read more”.
- Read More URL: optional. Enter the target URL the system shoudl use when a visitor clicks the “read more text” link. If you do not enter a URL, the system will link to the default WordPress generated press release archive page.
- TIP: in order to control how the full archive listing is displayed, we recommend create a separate PR Listing set to show a very high number of releases then insert that PR Listing shortcode into a page.
- Category: Required. Check all that apply.
- NOTE: don’t forget to edit an existing listing if you add/edit/delete categories since the listing was created.
- Tags: optional. Check all that apply.
- NOTE: don’t forget to edit an existing listing if you add/edit/delete tags since the listing was created.
- Publish: required to save settings. If you’re editing an existing listing, the button will be labeled “Update” and any changes made will automatically be pushed through to any instance of the listing in the frontend.
USING LISTS INSIDE PAGES

- After publishing/updating your listing, you can insert it into any page or post type by copying the shortcode that appears at the top of the “PR Listing Settings” metabox.
- Be sure you paste this into any page/post as plain text and include the opening and closing straight brackets.
- You may insert the Listings Shortcode into tabs, toggles, and column shortcodes.
- You may use the shortcode in as many pages/posts as desired, there are no limits to how many times a shortcode may be used and if you edit it at any point, all instances throughout your site will have those changes applied in real-time.