From the “Press Releases” admin panel, either open an existing PR or select “Add New Press Release.”

- Title: required.
- Content: required. IMPORTANT: do not include the first paragraph of PR copy, you’ll insert that in the “summary” field. You are free to add links, header styles, insert images or videos and use shortcodes.
- Release Date: optional. If a date is entered, it will appear before the “Location” info on the frontend. Keep in mind, this will not have any impact on when the PR is actually published, you’ll be able to control that in the “publish edit” settings below.
- Tag Line: optional.
- Location: optional.
- Summary: required. This should be the first paragraph of the release and serves as the excerpt portion for PR Lists set to display more than just the title.
- Boilerplate: required.
- PDF Release: optional. You may elect to upload a pdf copy of the PR and if you do, it will automatically create a download button for that file on the frontend. Use the “Delete” checkbox to remove a copy already assigned.
- Word Release: optional. You may elect to upload a doc/docx copy of the PR and if you do, it will automatically create a download button for that file on the frontend.Use the “Delete” checkbox to remove a copy already assigned.
- Category: required. You may assign multiple categories if desired.
- Tags: optional. You may assign multiple tags if desired.
- Featured Image: optional. If selected, the image will be used on PR Listings and as the primary image for any social sharing. Likewise, many PR web crawlers will recognize this image as one to assign with the release.
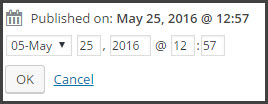
- Publish Date/Time: optional. This is an enormously useful option in that it allows you to set the precise date and time a release will be published. It’s a must-have for releases with embargoed information.
- When clicking the “edit” link you’ll see options for the month, day, year along with hour and minute.
- For time, the system will determine that based on your local time zone.
- Be sure to click the “OK” button when done.
- Publish: required to save settings. If you’re editing an existing PR, the button will be labeled “Update” and any changes made will automatically be pushed through to any instance of the listing in the frontend.
FRONTEND DISPLAY
Here’s an overview of how everything in the PR admin panel ends up being used on the frontend. We’ve included the PR Boilerplate admin panel as well in order to provide a comprehensive picture.
