The boilerplate post type allows you to create an unlimited number of PR boilerplates which may be assigned to individual Press Release posts. By separating the boilerplate from the the press release, you’ll have an unprecedented amount of freedom to retroactively edit boilerplate info; imagine, no more outdated contact or social media info!
You can even create boilerplates that combine info from two or more boilerplates, an especially useful option when you need to issue a joint PR and include the other organization(s) info.
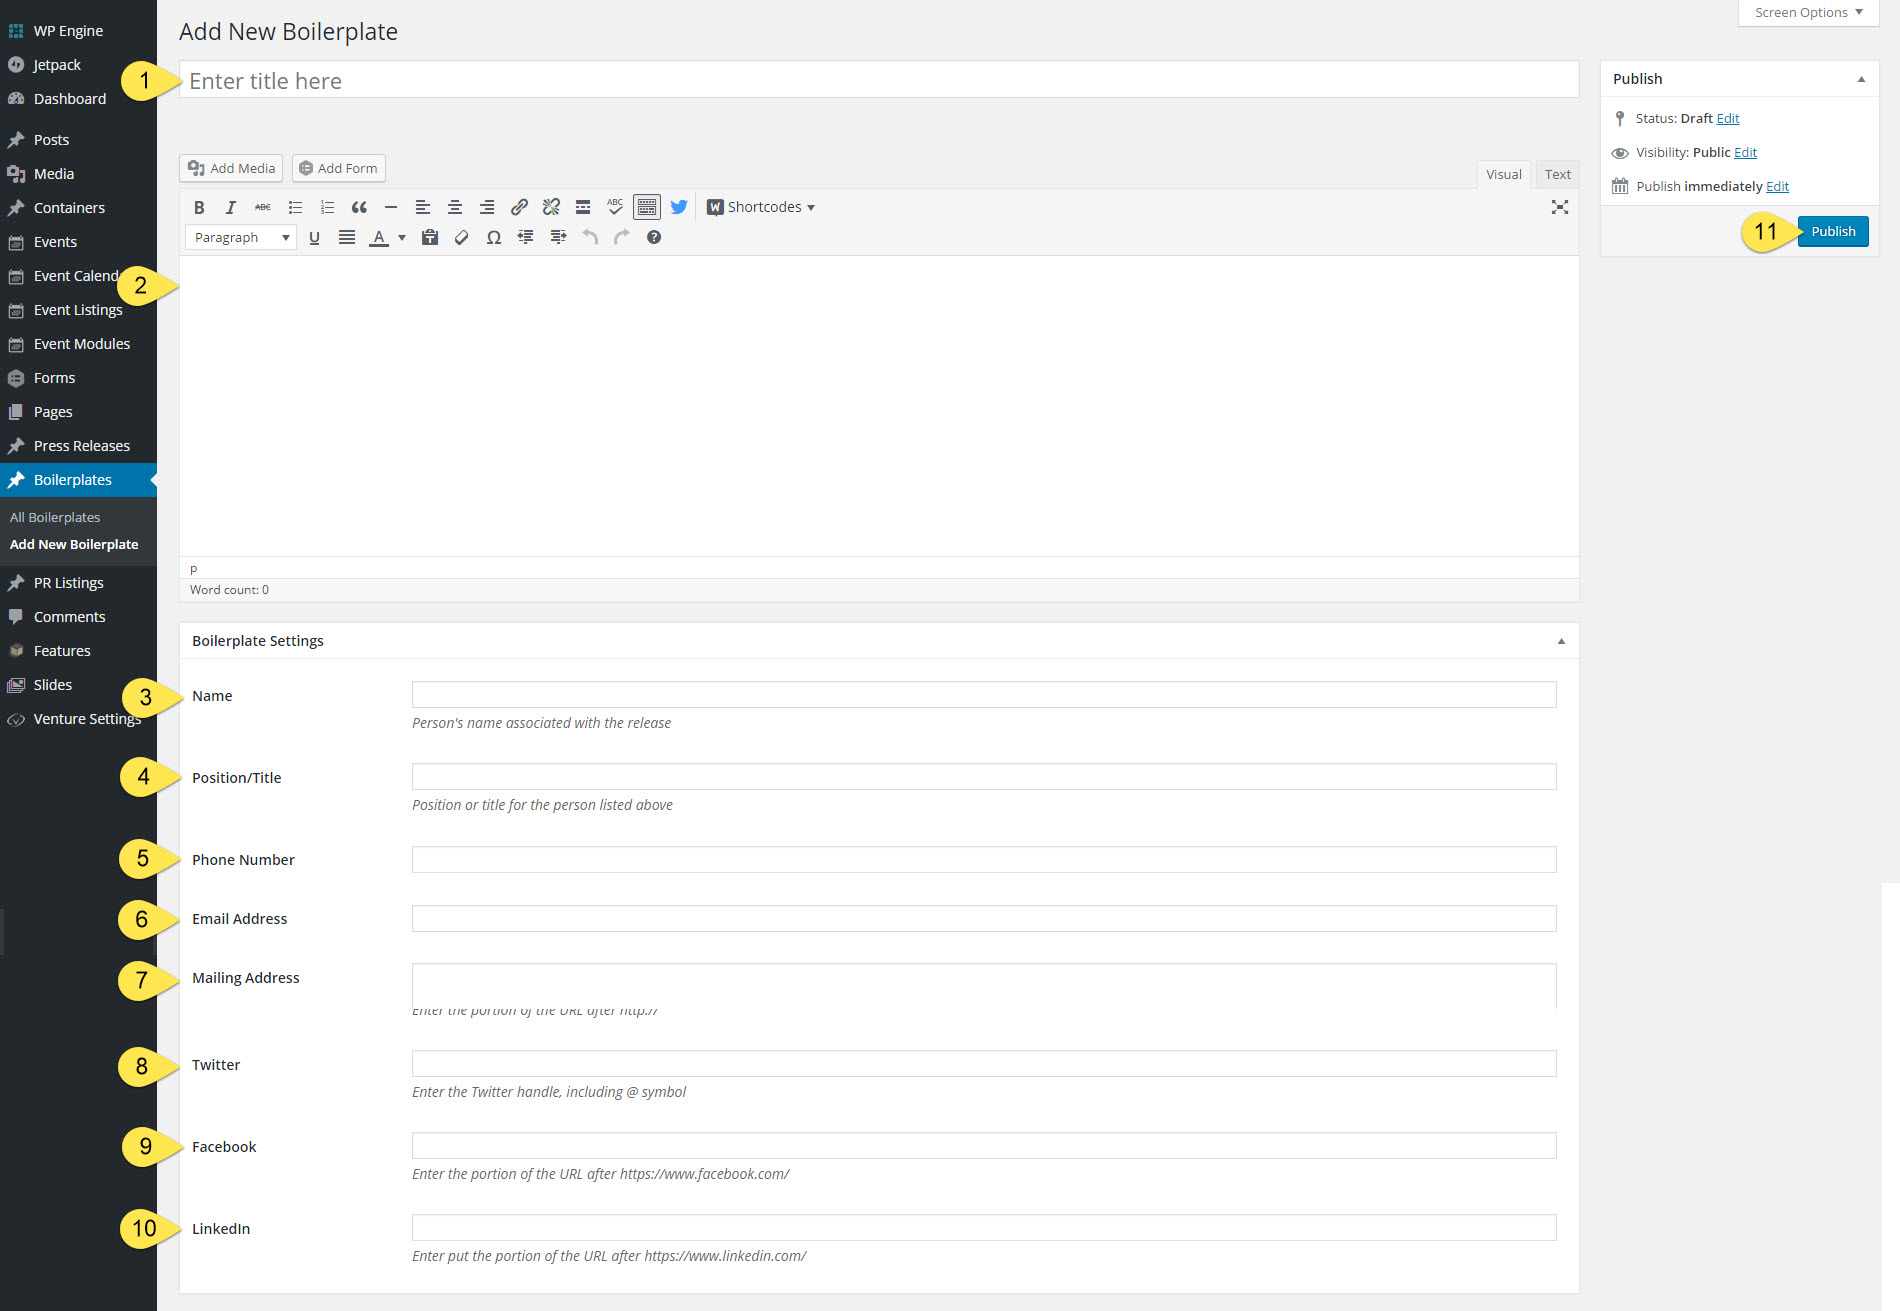
- Title: required but admin use only. This is also the name you’ll see when selecting the boilerplate to assign inside the PR admin panel so we recommend making it short, unique and descriptive.

- Boilerplate content: required. You can add as little or as much copy as you prefer and include linked copy, images, or videos.
- Name: optional but recommended.
- Position/Title: optional but recommended.
- Phone Number: optional.
- Email Address: optional. This will be converted into a clickable email link.
- Mailing Address: optional. We recommend inserting address lines breaks manually
- Website: optional but recommended. This will be converted into a clickable email link.
- Twitter: optional but recommended. This will be converted into a clickable email link.
- Facebook: optional but recommended. This will be converted into a clickable email link.
- LinkedIn: optional but recommended. This will be converted into a clickable email link.
- Publish/Update: required in order to save.
FRONTEND DISPLAY
The “Boilerplate Settings” fields are pre-styled to display that content in a good looking, list format with a special tabbed layout. Here, you can see how each of the those items looks to site visitors:
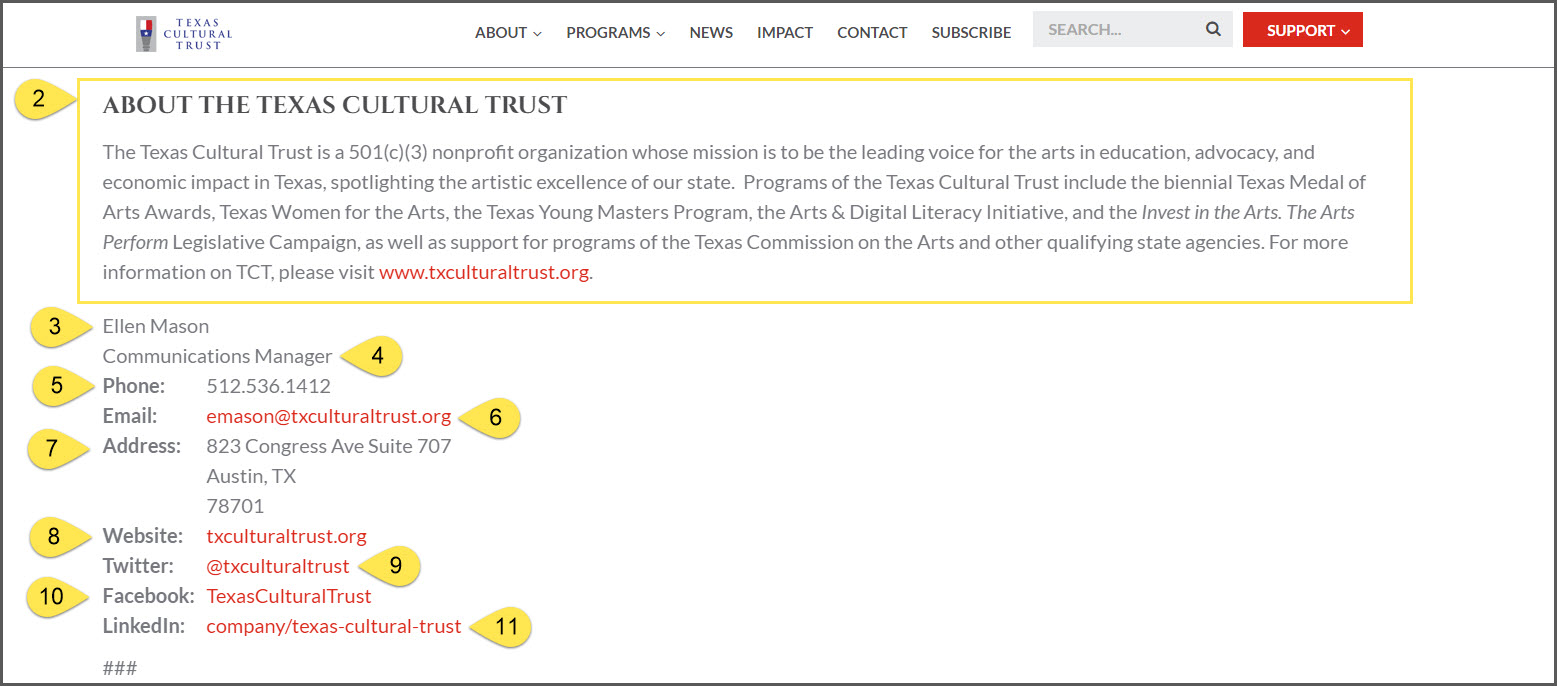
Note: the system will automatically insert ### at the end of the boilerplate content for you.